Home » 1973 Jaguar E-Type V12
This Series 3 E-Type came to us for a full restoration. As you can see it was in a bit of a state with a cracked windscreen, damaged hood, rust, and numerous dents all over the bodywork. Its original Heather paint (a colour only offered in 1973) with matching interior.
The restoration took 12 months from start to finish, so take a look through different stages of the project below.
Bodywork and engine begin to be stripped down and parts documented for repair, or replacement.
- Strip One: We have taken off all the front bodywork. You can now appreciate the size of the massive V12 engine.
- Strip Two: All flooring and lining inside the cabin is removed.
- Strip Three: The engine is out! And the front suspension and steering is off. Just the rear subframe to go.
- Strip Four: Now the shell is ready to be loaded onto the lorry and taken away for acid dipping.
- Strip Five: Here is the whole rear subframe assembly looking very rusty and showing its age. We’re sending all the bits off to be gently blasted back to bare metal and then straight back here for a generous coat of black Novol paint to keep them looking great for years to come.
The E-Type shell has now come back fully cleaned and has been given a coat of primer to protect it. We’ve mounted the shell on our jig to make sure everything stays completely square.
There is plenty to do, a couple of rotted rear suspension pick up points to replace, plenty of rusty floor and inner sills to repair. We are busy fabricating new parts to replace the rusty ones. Once it is done new outer sills will go on.
We are also fitting new door skins. Then once the bodywork is done and the shell goes into the spray booth we will start work on the engine.
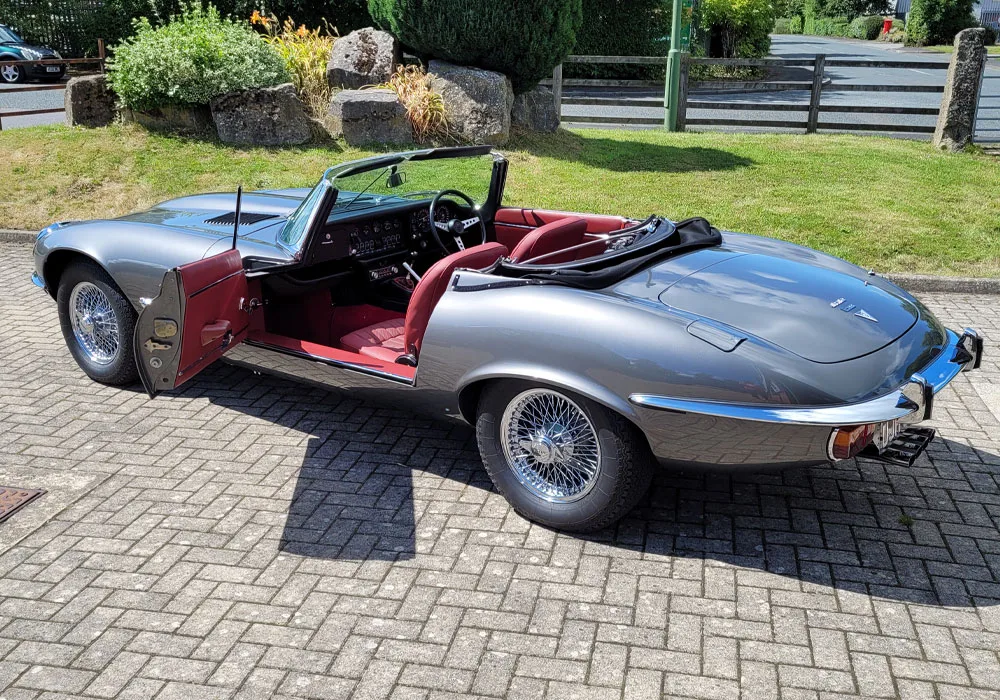
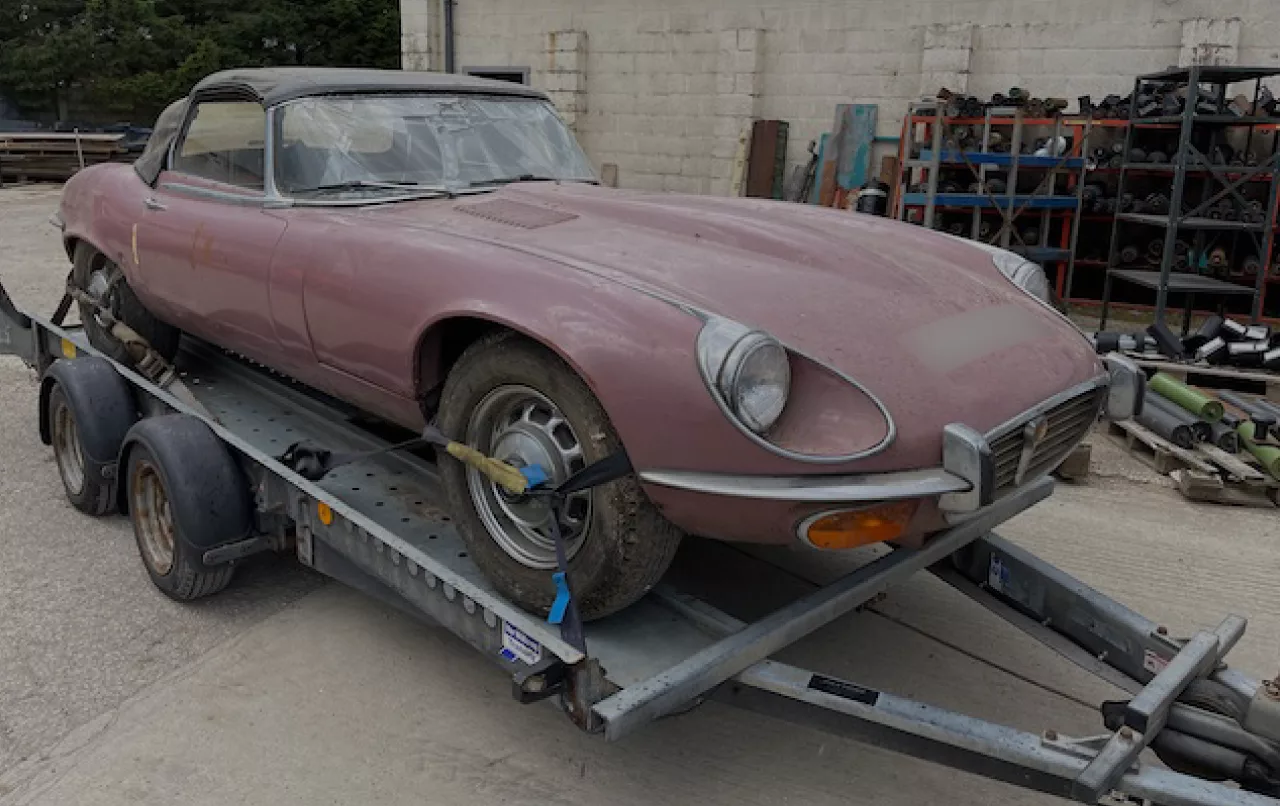
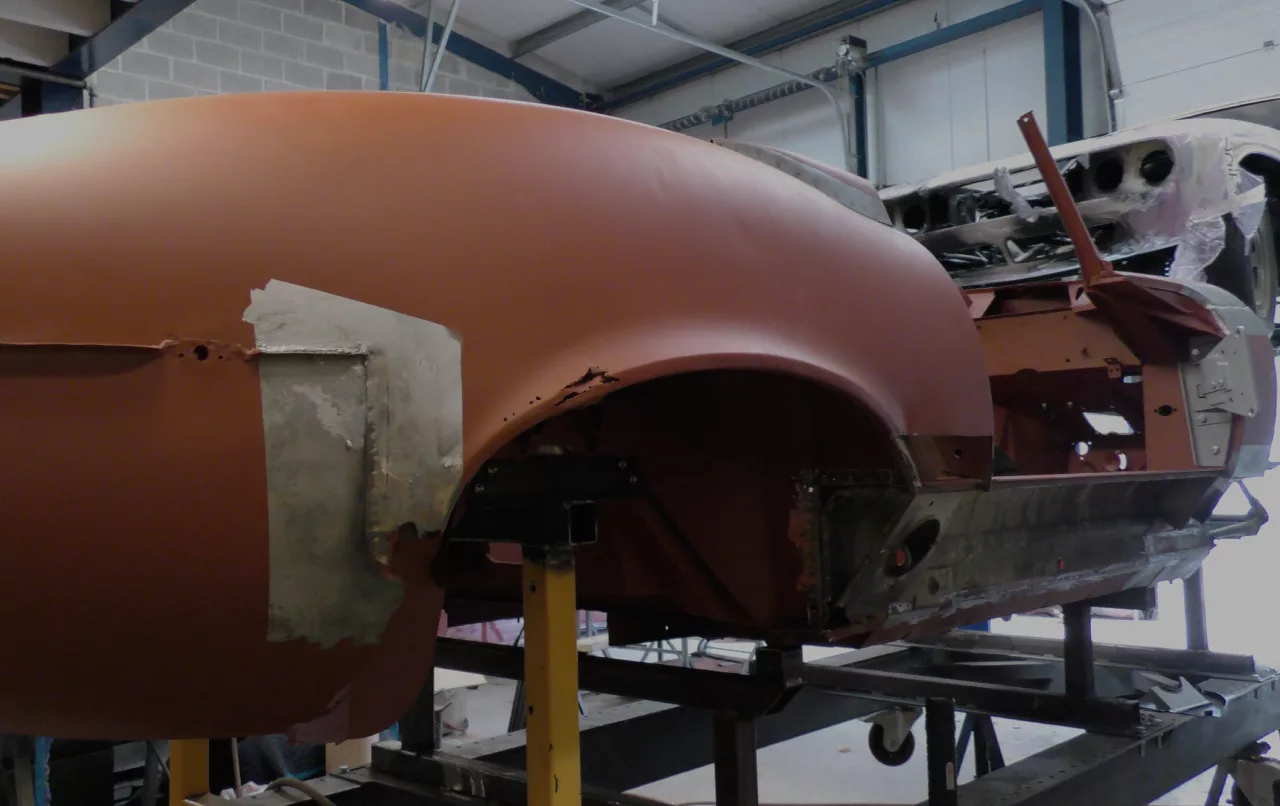
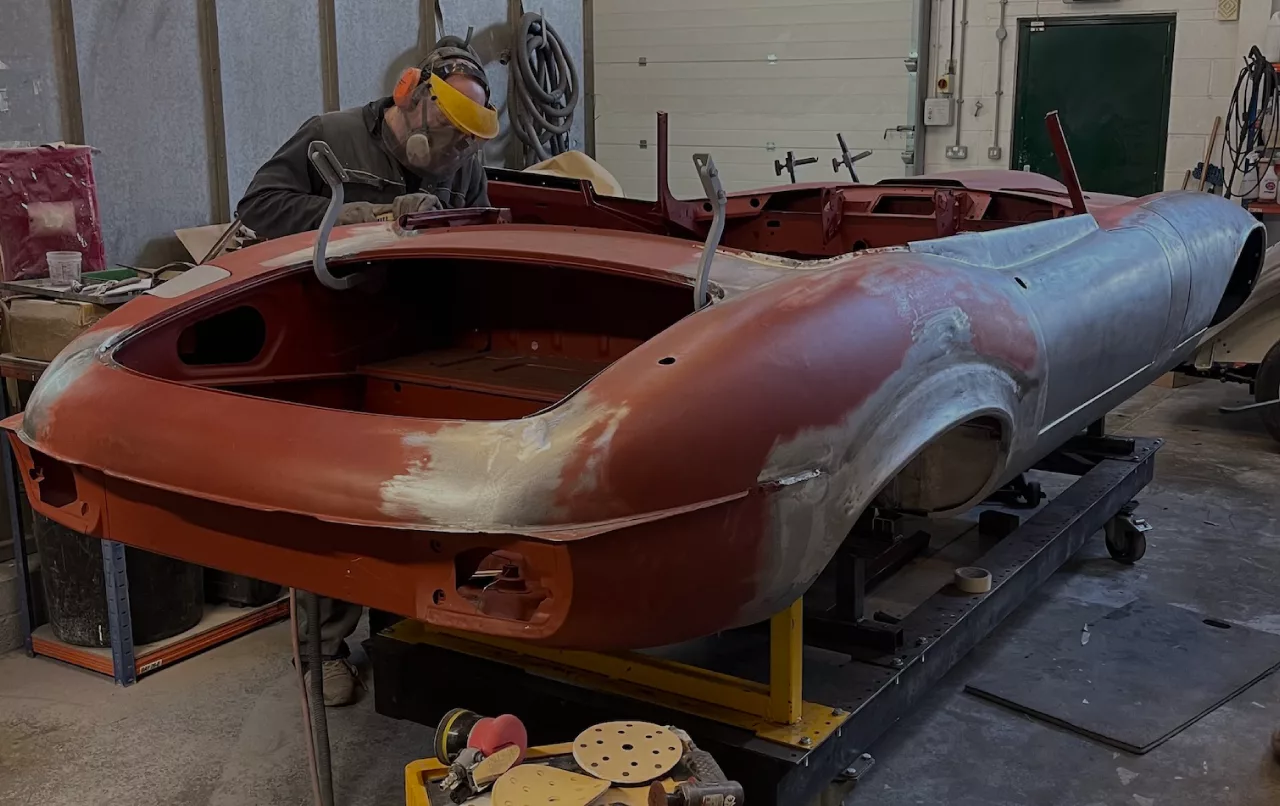
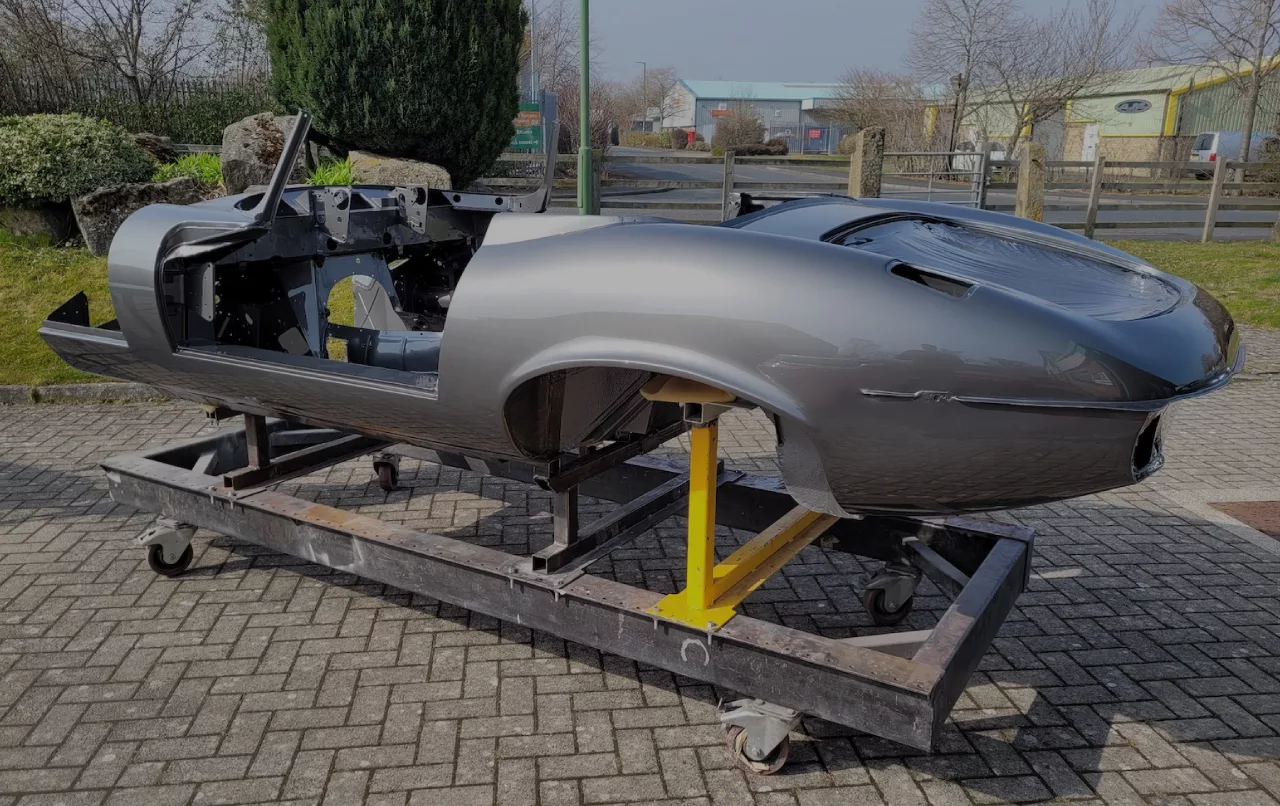
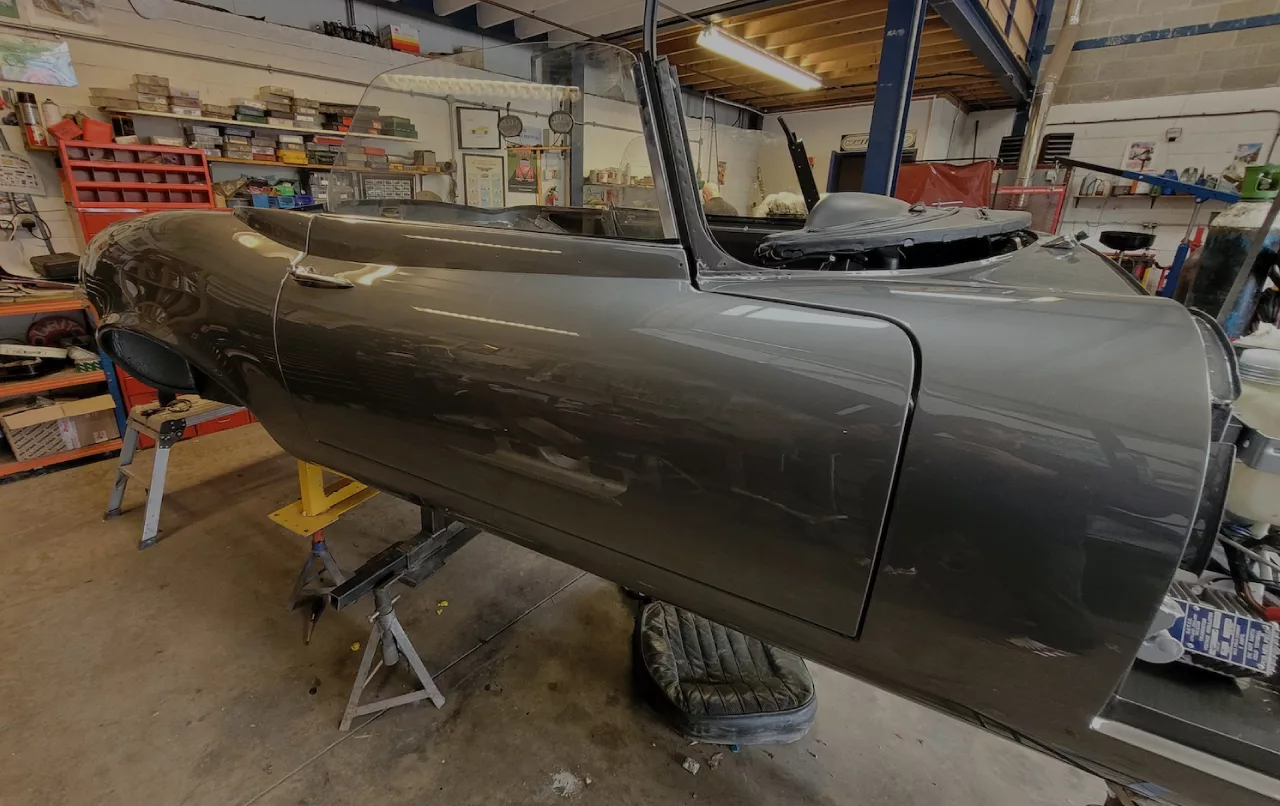
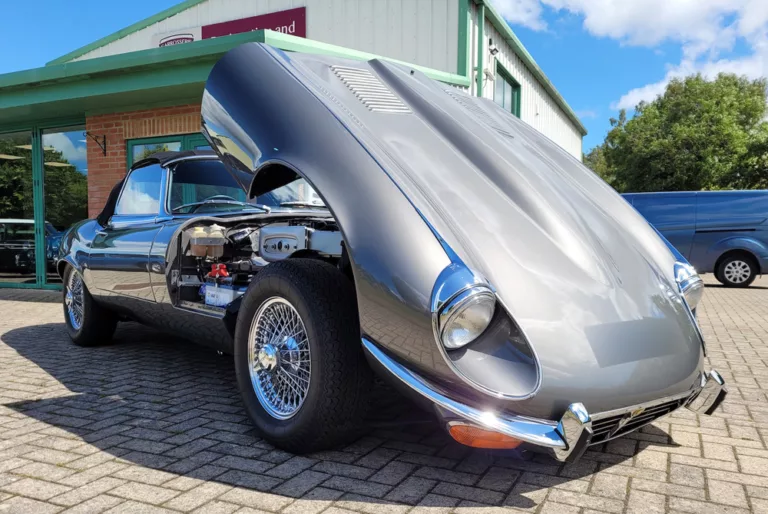
The E-Type bodyshell is really taking shape now.
After we carried out all the structural repair work to rear suspension mounting points and rust repairs behind the sills, we welded the new sills in place.
We have fitted the new door skins and got the shut lines right all the way round. The chrome trim is also fitted on both doors and matches the screen surround.
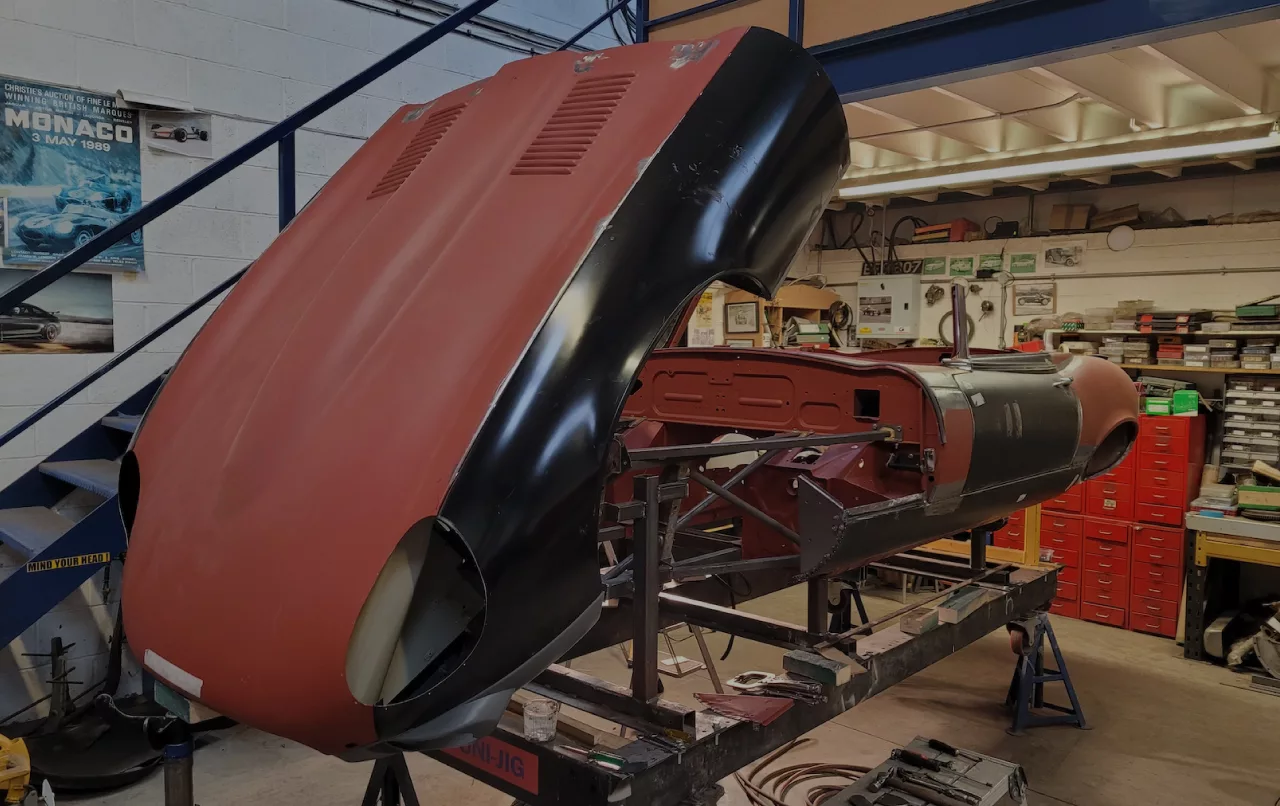
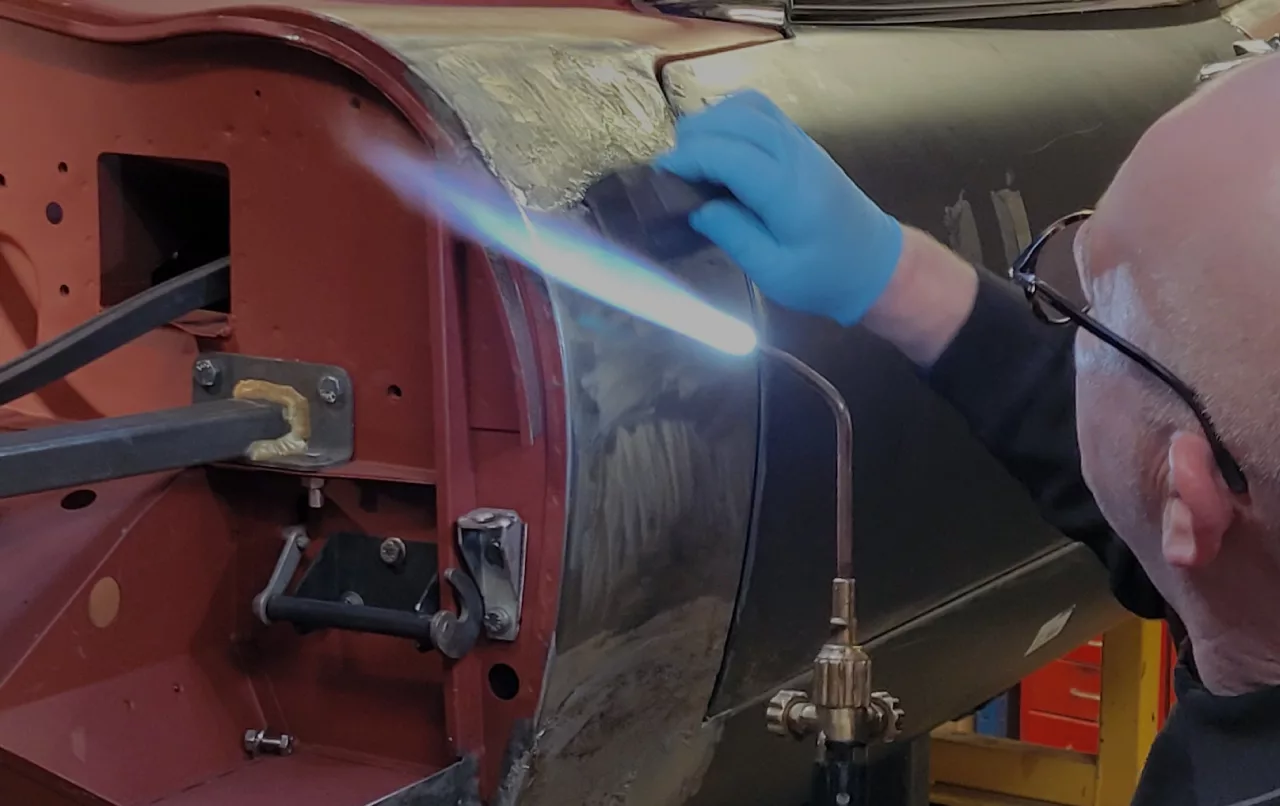
The bonnet has been fitted together. The main bonnet panel has had all the louvres carefully realigned and is now fitted to a new under panel with two new wings.
The whole bonnet has been carefully aligned with all the internal panels and then carefully shimmed at the pivot points to get the bonnet shut lines right.
Next steps are to weld the brackets for the grill and get the headlight surrounds in place. After final check over it will be ready to head to the paint shop for the start of the panel preparation work.
Whilst plastic body fillers have come a long way since its arrival in the 50’s there are still some jobs that are best done the good old-fashioned way, which is why our V12 E-Type panels are being lead loaded.
We have also resprayed the fuel tank, rear suspension and various other parts in-house.
This is the first stage of preparation for painting.
The wheel arch repair panel has been welded in. This was difficult as it is a double thickness panel, so it cannot be welded from behind. The repair panel was ’stepped’ so it can be welded in place from the outside only. Lead has then been added as a waterproof filler.
Both sides of the car are then sanded to bare metal in preparation for the epoxy primer.
Now that the E-Type shell has been sprayed in epoxy primer it is ready for the next stage.
The car is now painstakingly flatted and filled to make sure all panels are exactly the right shape, and all panel gaps are correct. This is the most time-consuming part of the shell preparation.
The time spent now means that the finished shell will look amazing when it is finally painted.
Lots of work by our engineers to the front section with more pipework added including break vacuum pipes and vacuum tank.
- Fully rebuilt heater with new heater matrix.
- Doors have been put on and built up, just inner cards to be added next.
- Interior sill trim and chrome work has also begun, with the gorgeous red leather seat covers added.
- Engine built up and is now running. One or two issues to rectify with fuel flow.
- Front and back wheel axles fitted with suspension, breaks also fitted.
- Windscreen and hood fitted but need to be adjusted to fit with doors and hood tension corrected.
- Various chrome work now fitted including back bumper and various trim.
- Bonnet all built up and sprayed.
- Exterior has begun to be re-assembled, including all panels/doors, handles, chrome work, wheels/tyres, canvas convertible roof and bonnet fitted.
- Mechanical: Engine, exhaust system, suspension, breaks, and electrics are being fitted.
- Interior: Seats have been reupholstered, door cards installed, headliner and flooring carpets fitted, and finally the boot has been lined with beige leather.